Having doubts? We offer free returns within 90 days of purchase. Final sale items excluded.

Translation missing: en.general.currency.dropdown_label

0 Cart
Added to Cart
    You have items in your cart
    You have 1 item in your cart
      Total

      Call Board: a theatrik blog — self tape questions

      Answers to Your Self-Tape Questions: Part One

      This article was originally posted on July 22, 2021.

      Self-tapes are here to stay, and for those new to recording their own auditions it can be a confusing and sometimes frustrating territory to navigate. I've compiled a list of a few of the questions I've received followed by my answers, and will be answering more in later blog posts. If you have a self-tape question you'd like answered, reach out on social media @shoptheatrik, or email hello@shoptheatrik.com


      Do I have to have a reader or can I pre-record the other characters’ lines and play them from my phone?

      A reader who is there with you in person is always your best option. It gives you someone to play off of in the scene. However, there might be times when having a reader there with you is not possible. You could pre-record the other characters’ lines but then you’re likely stuck constantly hitting pause and play during your take. It’s hard to concentrate on acting when your focus is on cueing up the other lines, unless you time your recording just right that you can play it straight through and still get your lines in. An alternative is to reach out on social media - there are Facebook groups specifically for actors looking for readers. Additionally, there are a number of apps designed for this very purpose. A quick internet search should lead you to a healthy list. You can also check out this Backstage article “13 Apps Every Actor Should Use.”


      For musical auditions, should I sing a cappella or try to find an accompanist?

      Unless your audition instructions specify otherwise, you’ll likely want to have accompaniment. You could certainly hire someone to play the music for you live, or you could record them playing it and make your self-tape without them present. However, finding an accompanist is not always possible. Playing the music from your phone is totally acceptable and pretty standard for a self-tape. If the music isn’t provided by the casting office, you can likely find it on the internet.


      Is light from a window sufficient?

      Natural sunlight is great and usually looks good on camera. However, you shouldn’t rely on a window as your sole lighting component. What if the sun moves or is covered by clouds in the middle of your recording? The lighting will change on camera and might not be consistent throughout your audition. What if the sun is so bright you have to squint to get through your audition? Or what if you have to record at night and don’t have the benefit of natural sunlight? You’ll want to invest in a good lighting kit to ensure you can be clearly seen on camera.


      How do I prevent shadows from showing up on my backdrop?

      Shadows appear when you are standing too close to your backdrop. Moving closer to camera and further away from the backdrop will reduce shadows. You can also adjust your lighting device to a different position to help prevent shadows.


      Are “ring light eyes” really a big deal?

      Yes. If you are using a ring light, depending on how it’s positioned the ring of light can completely cover the irises, so the actor’s eyes appear to be “glowing.” If this happens it becomes difficult for a director to focus on the performance because, as you can imagine, glowing eyes can be rather distracting (not to mention creepy). If you use a ring light, try turning it around and bouncing the light off a white wall or reflector screen, or adjusting the height of the light so it’s not directly centered on your face.


      Do I need a backdrop or can I use a plain wall?

      A wall works just fine if you can paint it a light color that flatters your skin tone. White or beige walls usually don’t look great on camera and are often unflattering for the actor.


      What color backdrop is best to use?

      You should use a color that is flattering for your skin tone. Light blue tends to look good on all skin tones, but light gray and light pink are also great options for some. Avoid yellows and greens - these colors tend to make your skin look yellow or green on camera. Many actors use a dark blue backdrop, as it is widely available on such sites as Amazon, but the color isn’t flattering for everyone. You should also avoid colors that are too bright - you don’t want your backdrop to distract from your performance. Muted, light colors work best to ensure the focus remains on the actor’s performance and not what is happening in the background.


      Is an external microphone necessary or will the mic from my phone suffice?

      While it’s fine to use your phone’s microphone to record your sound, an external mic will enhance the overall quality of your audition. Lavalier microphones are great because they are small and can clip onto an actor’s clothing. The sound is clearer than a phone’s mic and it is easier to cut out the background noise.


      Keep those questions coming! Confused about how to edit your takes and send the file? Unsure what to do when the scene includes a kiss? I'll be answering more of your self-tape questions in future blog posts.

      How to Edit, Compress and Send Your Self-Tape File

      You've done it; you've moved furniture around to clear a space, positioned your camera *just right* to make sure you've framed yourself correctly, adjusted your lighting to avoid shadows, and done as many takes as needed to feel you've given it your best shot. In other words, you've successfully finished recording your self-tape audition. Now what?

      Here is a step-by-step guide on how to edit, compress and send your self-tape file using iMovie and WeTransfer. These are not the only programs that can be used for this task but are the ones I'll focus on for the purpose of this article.


      1. Import your clips into iMovie

      Select the library you wish to use for your self-tapes (in this example I'm using "Tapings"), then from the File menu select New Event.

      iMovie - file menu - new event

      You can rename the event (I've chosen Audition 1). With the name highlighted go to the File menu again and select New Movie.

       iMovie - file menu - new movie

      You can import your clips using an SD card or by selecting them from your desktop.

      import clips


      2. Take out the background noise

      This is a simple step that will improve the quality of your sound. Select all your clips by clicking on one and holding down the shift button as you select the others. Then click on the sound bars located in the upper right of your screen. Click the box next to "Reduce background noise" and slide the slider to 100%.

      reduce background noise in iMovie


      3. Create Your "Movie"

      Drag your clips down to the bottom half of the screen in the order you'd like them to appear. You can also reorder them after you've dragged them down by simply clicking on the clip and moving it.

      drag your clips to create your movie


      4. Trim the ends of your clips

      You will likely have a couple of seconds at the beginnings and/or ends of your clips that you do not want to include as part of your audition (maybe you were getting into place after hitting record or you needed a few seconds to breathe before starting the scene). You can trim these by positioning your cursor at the beginning or end of the clip, then clicking and dragging to the desired start/stop mark. Do not worry if you cut too much! You can always select "Undo" from the edit menu, or position your cursor where you need to edit the trim and extend the length.

       trim your clips


      5. Rename the file

      Most self-tape instructions will be specific on how they want the file named. If not, it's safe to label it with your name and the name of the role. To do this, click on "Projects" in the upper left corner of your screen.

      renaming a file in iMovie

      Select a file name and click OK. I'm using FirstnameLastname_ROLE.

      renamed file iMovie


      6. Compress the file

      Click the share button in the upper right corner of the screen (if in the Project screen, just click on your project and then the share button). Select File. Even if you are given instructions to email the video, post to Vimeo, etc., choosing File saves the video to your desktop, from which you can create a link, upload it to EcoCast, email it, etc.

      share the video

      Choose your resolution and compression quality, click Next and then click Save.

      choose compression quality


      7. Create a shareable link in WeTransfer

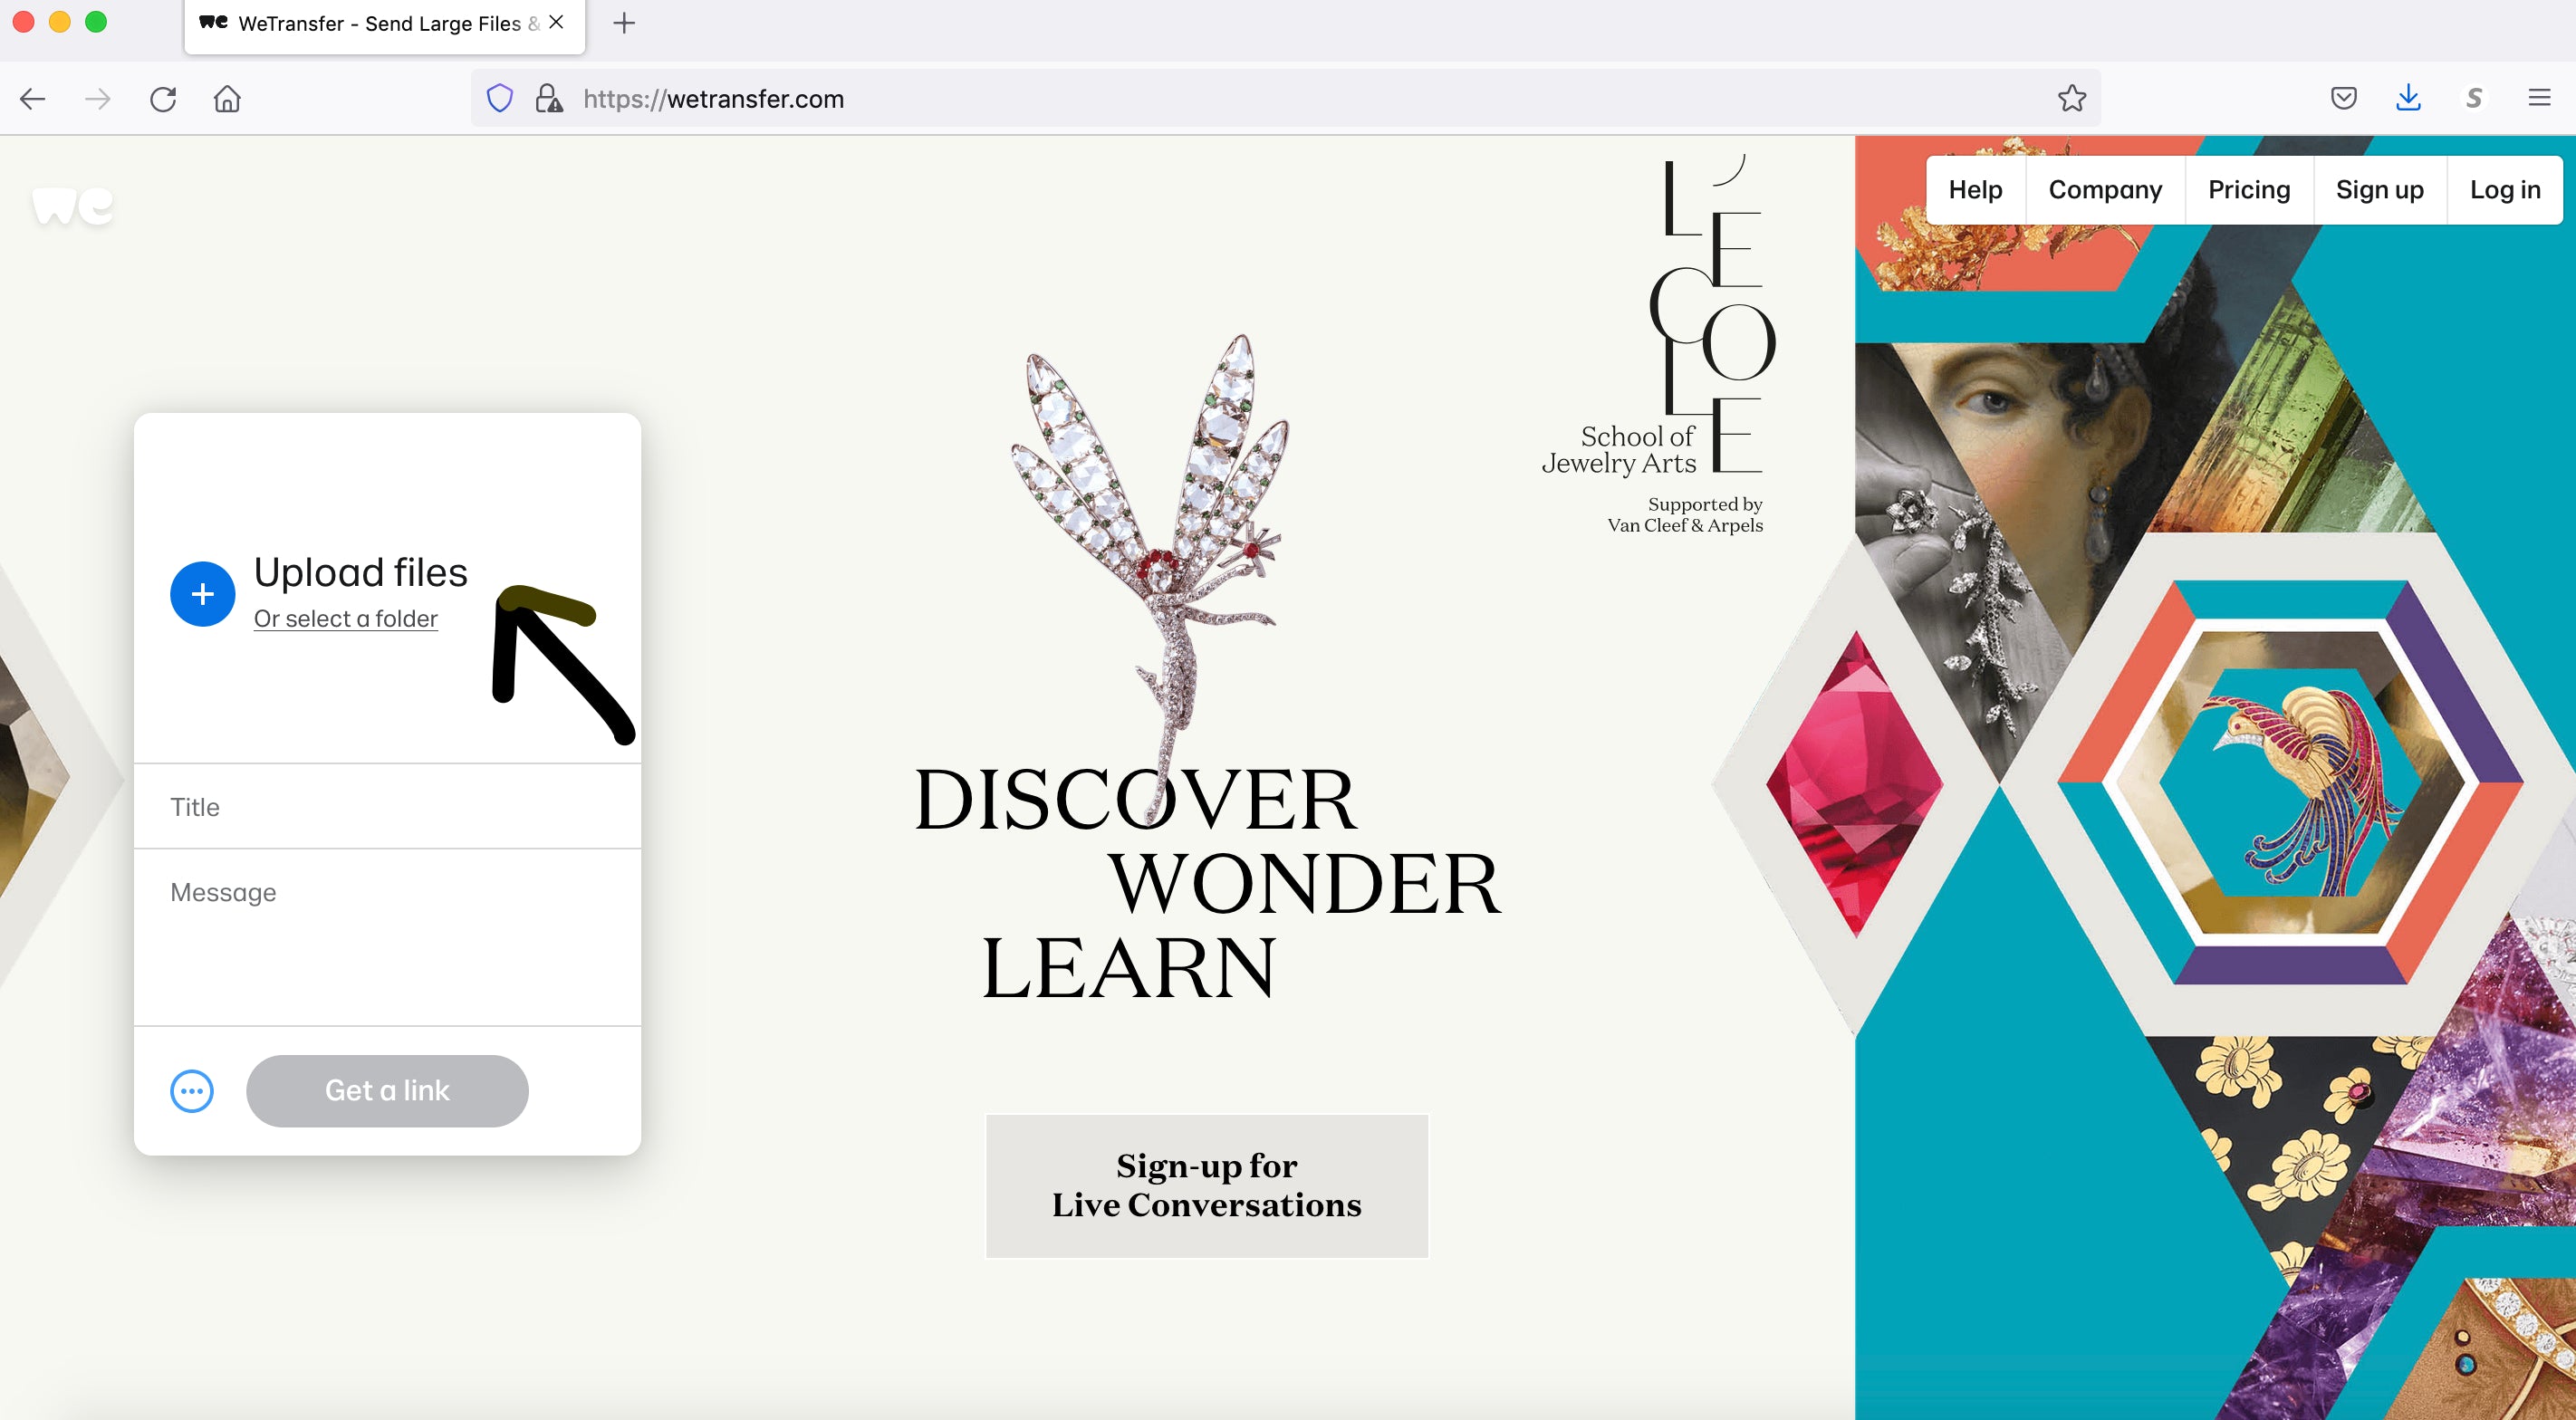
      If you are uploading to a service such as EcoCast, you can upload the video directly from your desktop. However, if you need to send a link to your agent, you can create one using WeTransfer. Go to WeTransfer.com and click "I just want to send files."

      send file using wetransfer

      Click Upload Files and select your file name from the list.

      click upload file

      Click Get a Link.

      get a link WeTransfer

      Once your link is ready, click Copy Link. Now you can share the link with your agent, manager, or whomever might require it.

      By following these steps you'll be able to edit, compress and send your audition files like a pro. Still have questions? Send an email or reach out on social media and I'd be happy to help.

      Answers to Your Self-Tape Questions: Part Two

      Three speech bubbles with question marks

      Self-tapes continue to plague even the most talented and tech-savvy. While you shouldn’t stress too much about your self-tape, you do want it to look and sound fantastic while giving your best performance (no pressure, right?). However, sometimes your character needs to do things in the scene that you’re just not sure about in an audition setting. This post (a continuation from July’s blog post "Answers to Your Self-Tape Questions: Part One"), is meant to alleviate some of those worries when it comes to challenging scenes.


      What do I do if there is a kiss in my scene?

      I have recorded countless self-tapes for actors in which the scene involves a kiss. Obviously in a self-tape situation (and any initial audition, generally speaking) you are not expected to pull your reader in for a lip lock (and shouldn’t, fyi). What you can do, however, is play the moment before the kiss happens. There is often a look, a movement, an acknowledgment of some sort. Enjoy this moment. In other words, don’t skip over it just because the physical kiss isn’t actually going to happen. The powers-that-be who watch your tape are going to be looking for those moments. The same idea applies to the moment after the kiss takes place, as well.


      The breakdown describes my character as either nude or scantily clad. Am I really supposed to be nude in the self-tape?

      No, though this can vary slightly depending on gender. For example, if you identify as male and your character is shirtless in the scene, it’s a pretty safe option to remove your shirt when appropriate. However, those identifying as female should not appear nude in a self-tape. You never know who will be watching your tape and where it might end up. You can, however, choose a skin-colored tank top and shorts which will accomplish the look of being scantily clad, and also suffice for a scene which calls for nudity. In general, you will not be expected to remove your clothes during a self-tape or initial audition. If you get far enough along in the casting process where it becomes imperative that you show your body, you will be given instructions on what is needed from you. When choosing how much to reveal during a self-tape, follow this rule of thumb: if what you're doing feels uncomfortable, you probably shouldn't be doing it.


      My character uses a weapon in the scene. How do I play this?

      Well, for starters, don’t use an actual weapon. You should never bring a weapon into an audition room - trust that any props you need will be provided by the casting director. If recording a self-tape, you don’t want to scare your reader by waving an actual knife around. There are two ways to approach the scene: you can either use an object similar to the weapon (think fake knife or something similar to the shape and size of the weapon) or you can mime the action without using any props. The key is to not let any prop you use overshadow your performance.


      Stay tuned for a future post titled "Answers to Your Self-Tape Questions: Part Three" regarding the technical nitty gritty of editing and sending your self-tape files.