How to Edit, Compress and Send Your Self-Tape File
You've done it; you've moved furniture around to clear a space, positioned your camera *just right* to make sure you've framed yourself correctly, adjusted your lighting to avoid shadows, and done as many takes as needed to feel you've given it your best shot. In other words, you've successfully finished recording your self-tape audition. Now what?
Here is a step-by-step guide on how to edit, compress and send your self-tape file using iMovie and WeTransfer. These are not the only programs that can be used for this task but are the ones I'll focus on for the purpose of this article.
1. Import your clips into iMovie
Select the library you wish to use for your self-tapes (in this example I'm using "Tapings"), then from the File menu select New Event.

You can rename the event (I've chosen Audition 1). With the name highlighted go to the File menu again and select New Movie.

You can import your clips using an SD card or by selecting them from your desktop.

2. Take out the background noise
This is a simple step that will improve the quality of your sound. Select all your clips by clicking on one and holding down the shift button as you select the others. Then click on the sound bars located in the upper right of your screen. Click the box next to "Reduce background noise" and slide the slider to 100%.

3. Create Your "Movie"
Drag your clips down to the bottom half of the screen in the order you'd like them to appear. You can also reorder them after you've dragged them down by simply clicking on the clip and moving it.

4. Trim the ends of your clips
You will likely have a couple of seconds at the beginnings and/or ends of your clips that you do not want to include as part of your audition (maybe you were getting into place after hitting record or you needed a few seconds to breathe before starting the scene). You can trim these by positioning your cursor at the beginning or end of the clip, then clicking and dragging to the desired start/stop mark. Do not worry if you cut too much! You can always select "Undo" from the edit menu, or position your cursor where you need to edit the trim and extend the length.

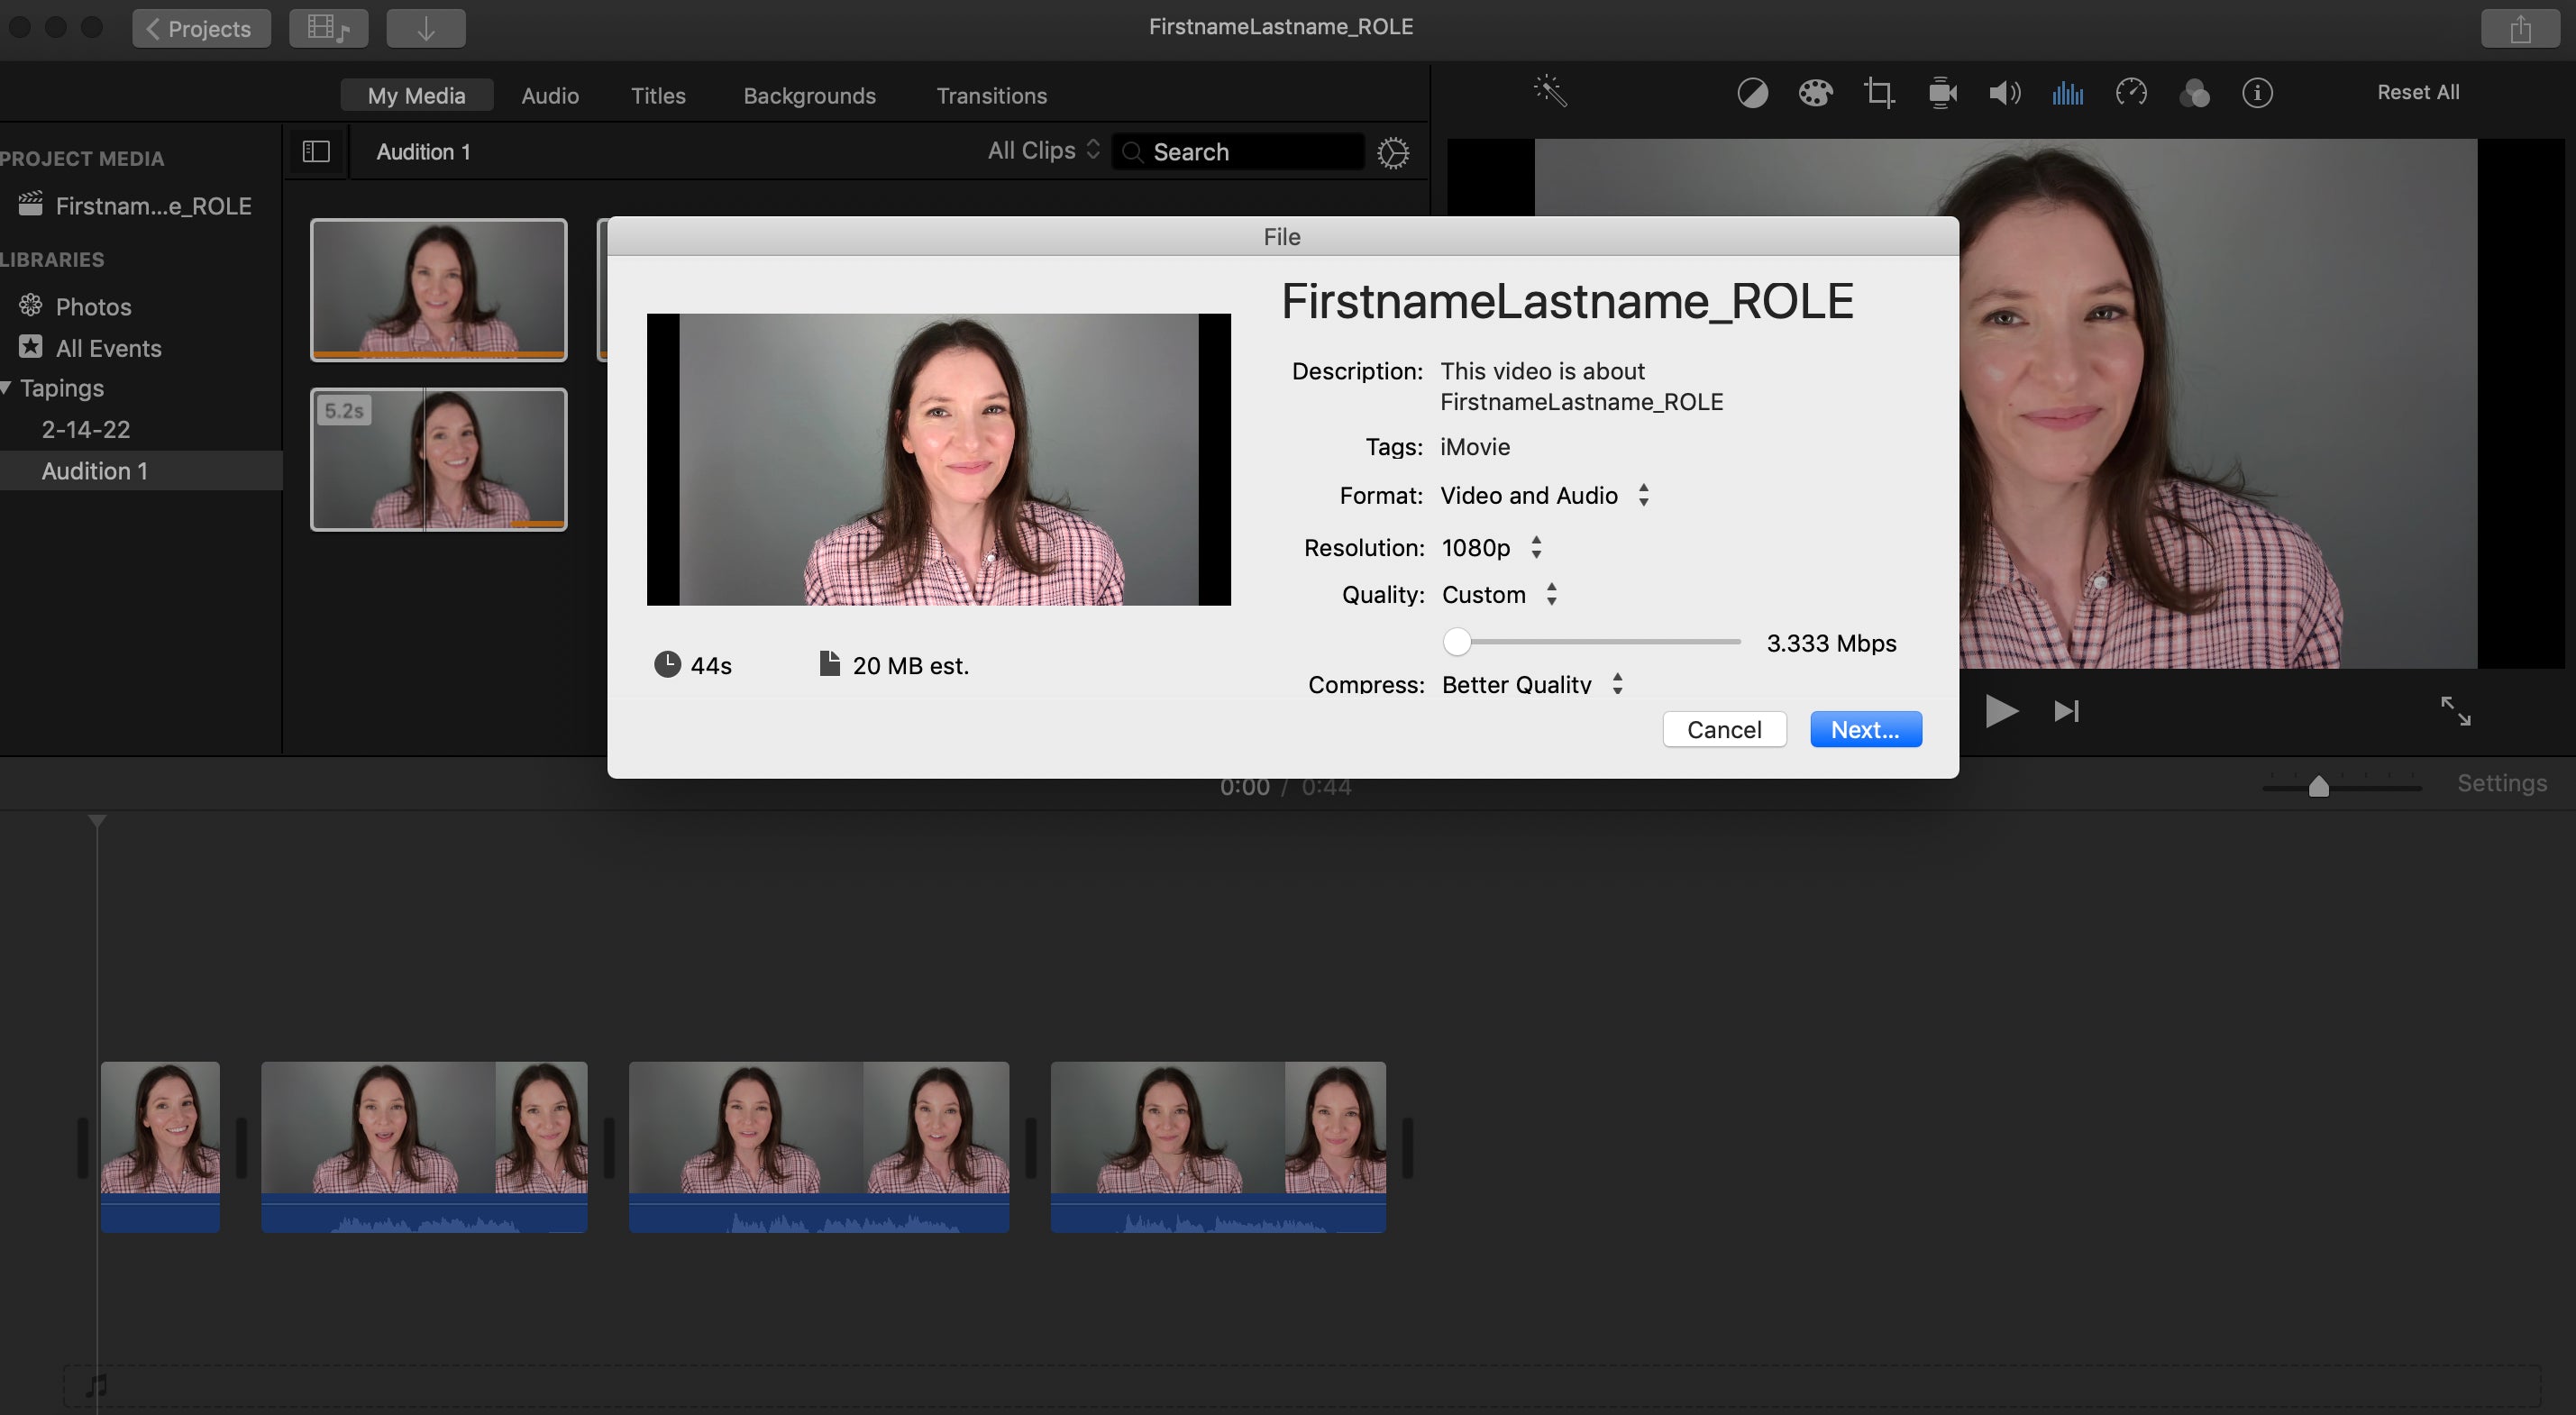
5. Rename the file
Most self-tape instructions will be specific on how they want the file named. If not, it's safe to label it with your name and the name of the role. To do this, click on "Projects" in the upper left corner of your screen.

Select a file name and click OK. I'm using FirstnameLastname_ROLE.

6. Compress the file
Click the share button in the upper right corner of the screen (if in the Project screen, just click on your project and then the share button). Select File. Even if you are given instructions to email the video, post to Vimeo, etc., choosing File saves the video to your desktop, from which you can create a link, upload it to EcoCast, email it, etc.

Choose your resolution and compression quality, click Next and then click Save.
7. Create a shareable link in WeTransfer
If you are uploading to a service such as EcoCast, you can upload the video directly from your desktop. However, if you need to send a link to your agent, you can create one using WeTransfer. Go to WeTransfer.com and click "I just want to send files."

Click Upload Files and select your file name from the list.
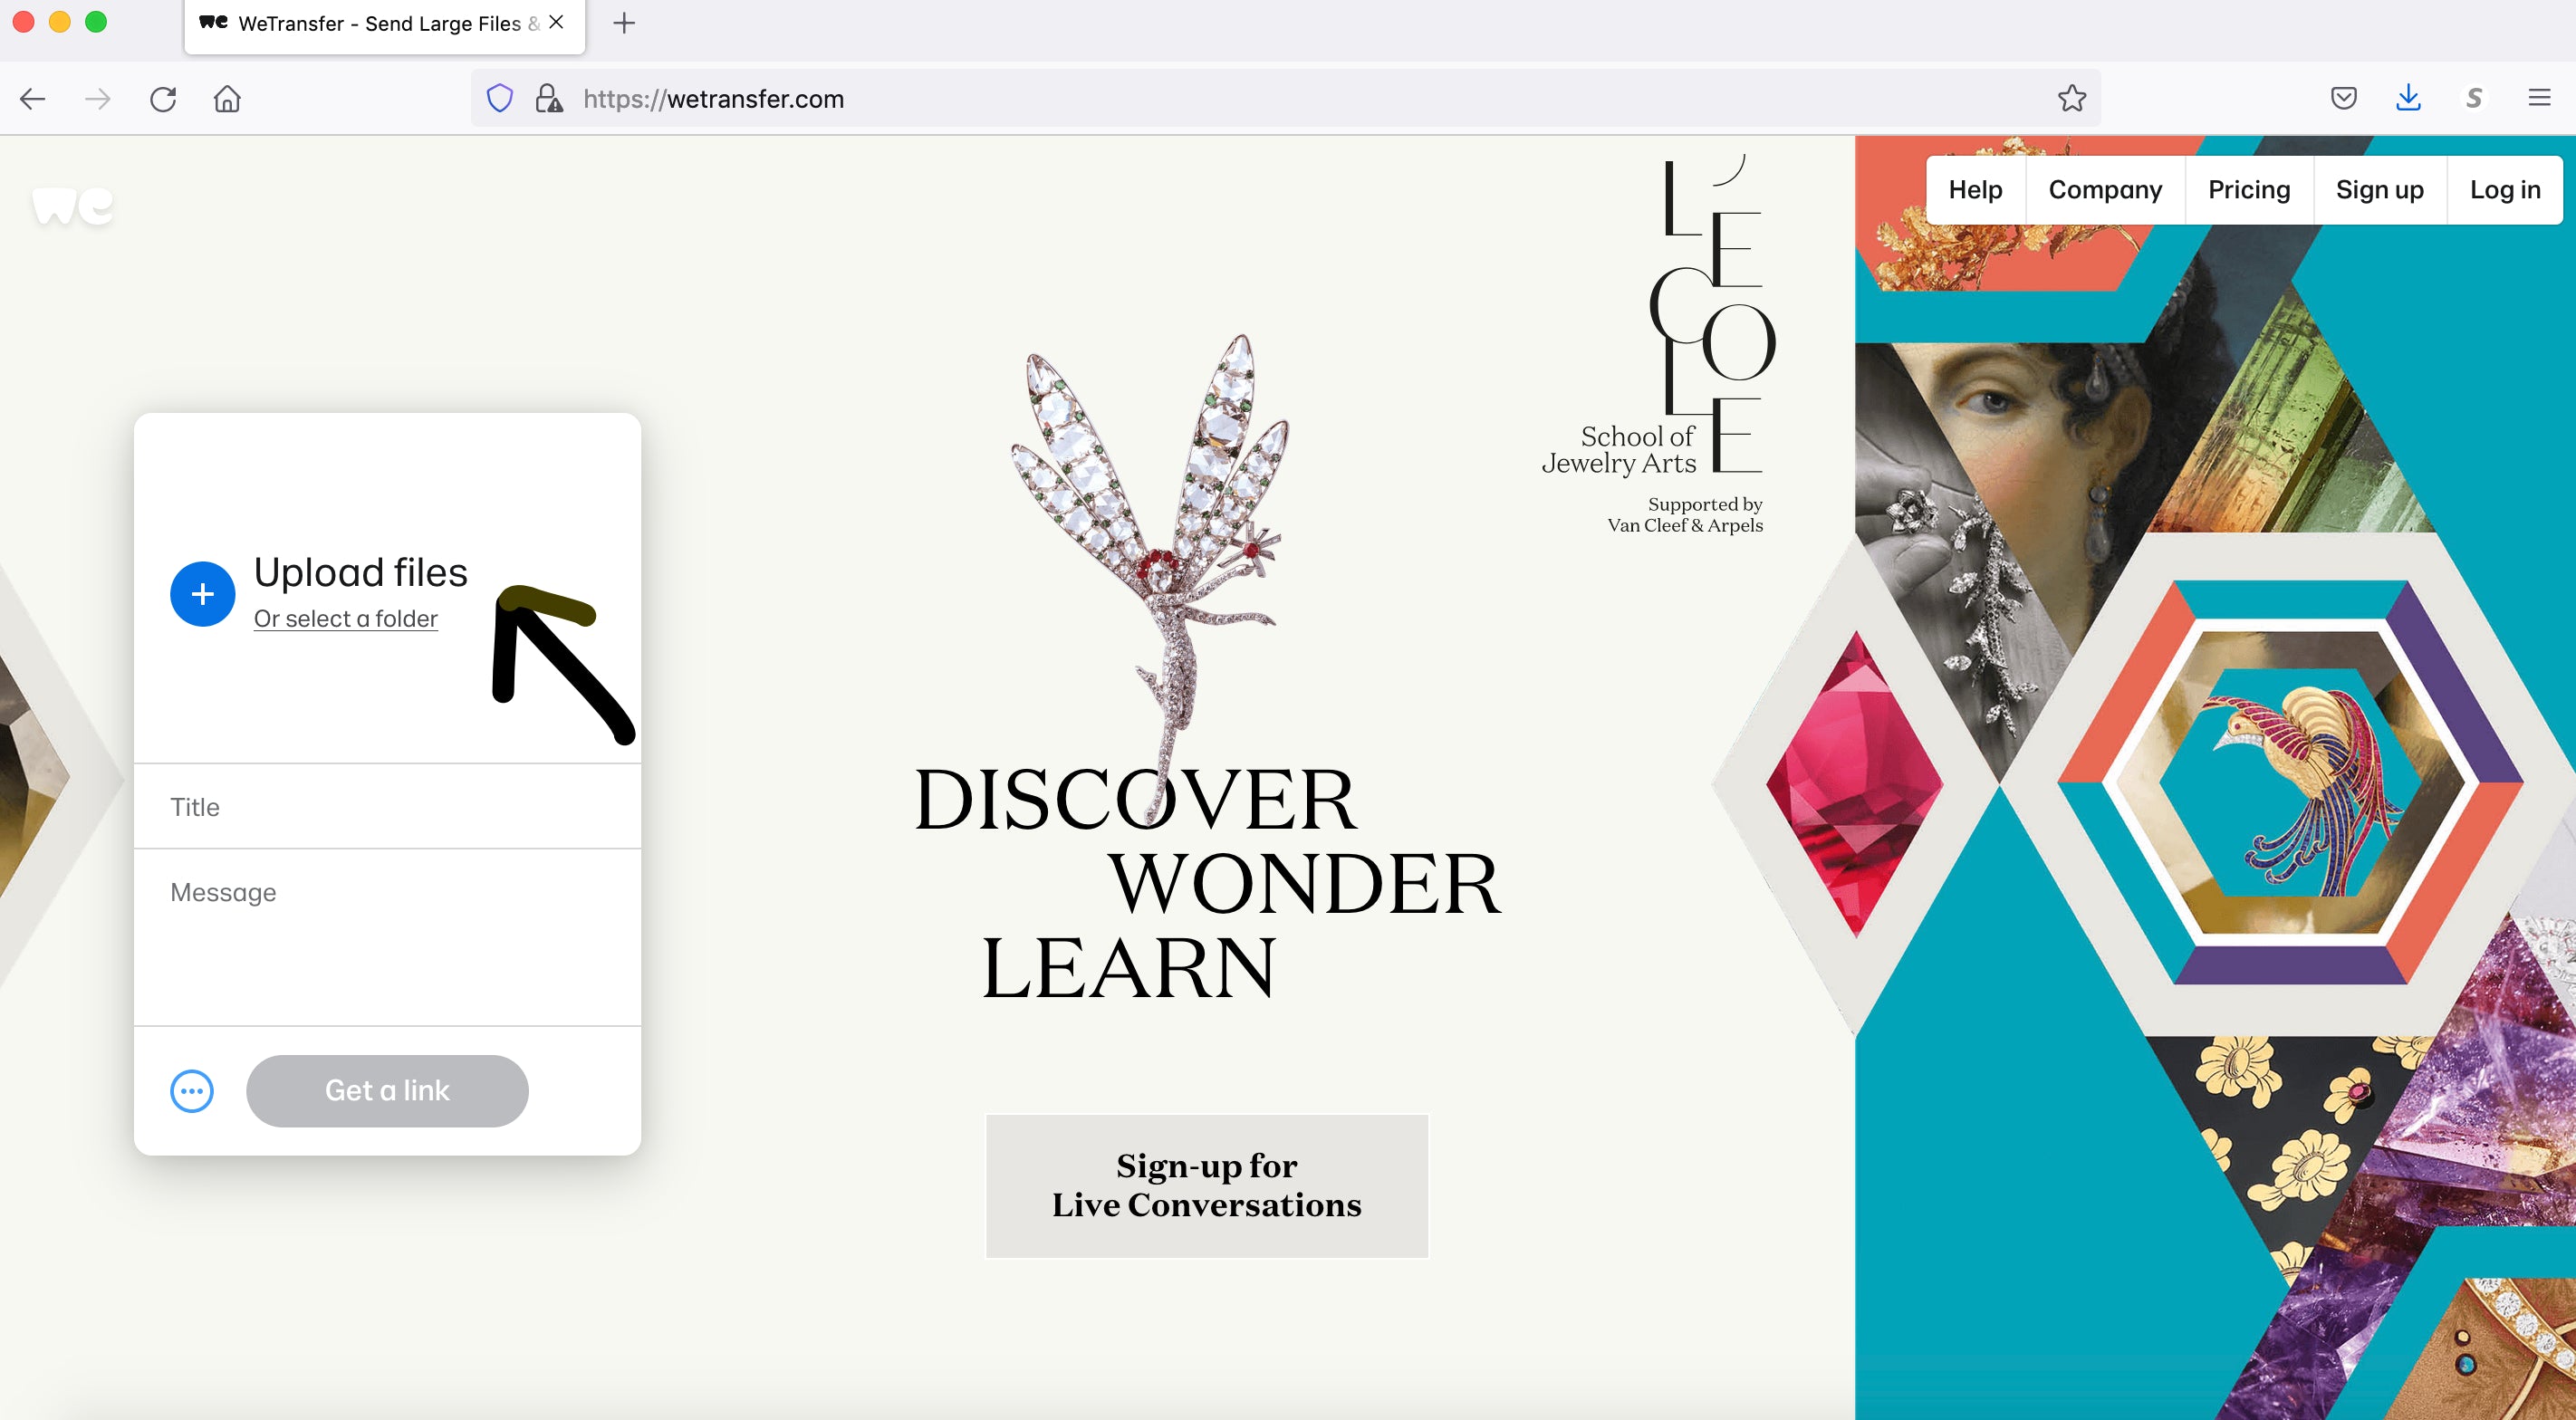
Click Get a Link.

Once your link is ready, click Copy Link. Now you can share the link with your agent, manager, or whomever might require it.
By following these steps you'll be able to edit, compress and send your audition files like a pro. Still have questions? Send an email or reach out on social media and I'd be happy to help.